May 6, 2014 - I didn't get today's comic started until midnight, so as such I decided to post it in stages as I worked on it as I've been curious how long an average comic takes me now that I've switched to digital and accounting for the added time it took me to upload extra images and other mistakes, I'm thinking it takes me three and a half hours now which indeed saves the half hour I had hoped it would from when I was drawing things by hand and scanning them in.
Unfortunately you're going to have to use the back button on your browser to look at the links below in sequence as it's 4am now and I'm a bit too tired to make individual pages for everything, but I may make a more organized post of all this information in the future.
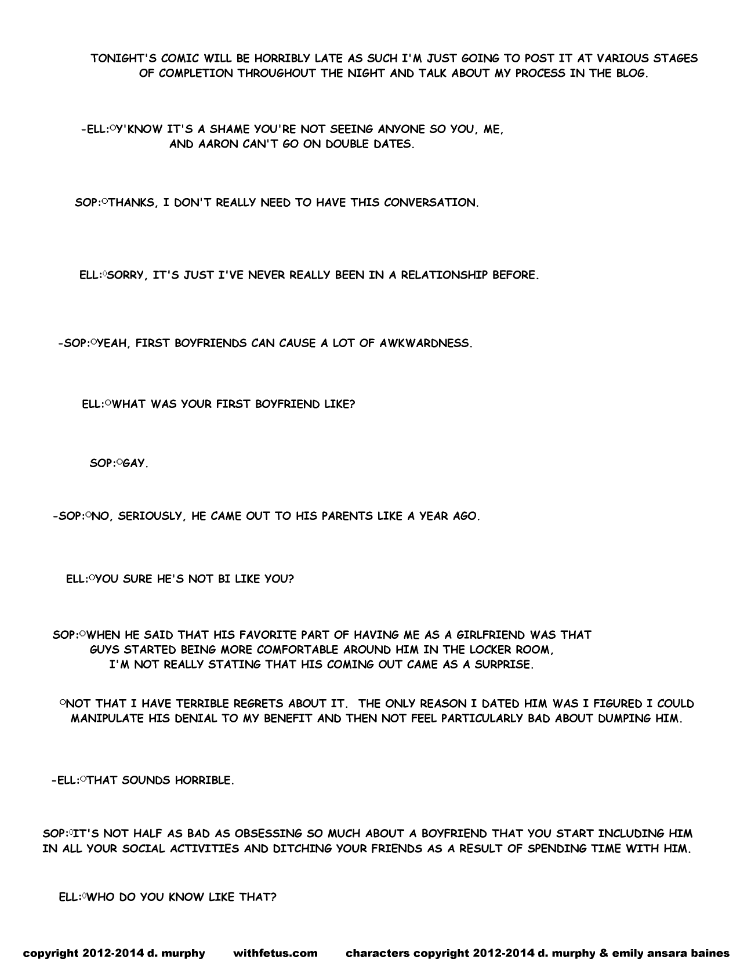
Step One: Scripting (approximate time: unknown). Generally I write my scripts in Notepad which has some obvious issues in terms of both saving and being able to undo making changes. It also means they're extremely difficult for anyone but me to read as I use shorthand for most character names (thankfully "ELL" and "SOP" are fairly easy to guess in this instance) and other actions and elements if I bother to include any (in this case there was nothing but dialogue which is true for the majority of scripts). Dashes denote panel breaks, and generally I'll separate the storylines into individual files with markers to indicate when weekends occur so I have an even multiple of five with an aim towards roughly 40-45 scripts for any individual story arc (with the storyline featuring Pamela continuing for an additional amount of time which I generally now believe was simply too long). Before moving the script into Manga Studio I'll generally paste it to Final Draft which (as the program assumes the whole thing's a scene heading) will both spellcheck and capitalize the whole thing, before moving the individual captions into Manga Studio. The writing of the script itself is probably one of the more variable elements of the process and though it should definitely not be said it doesn't take time, estimating that time can be difficult.
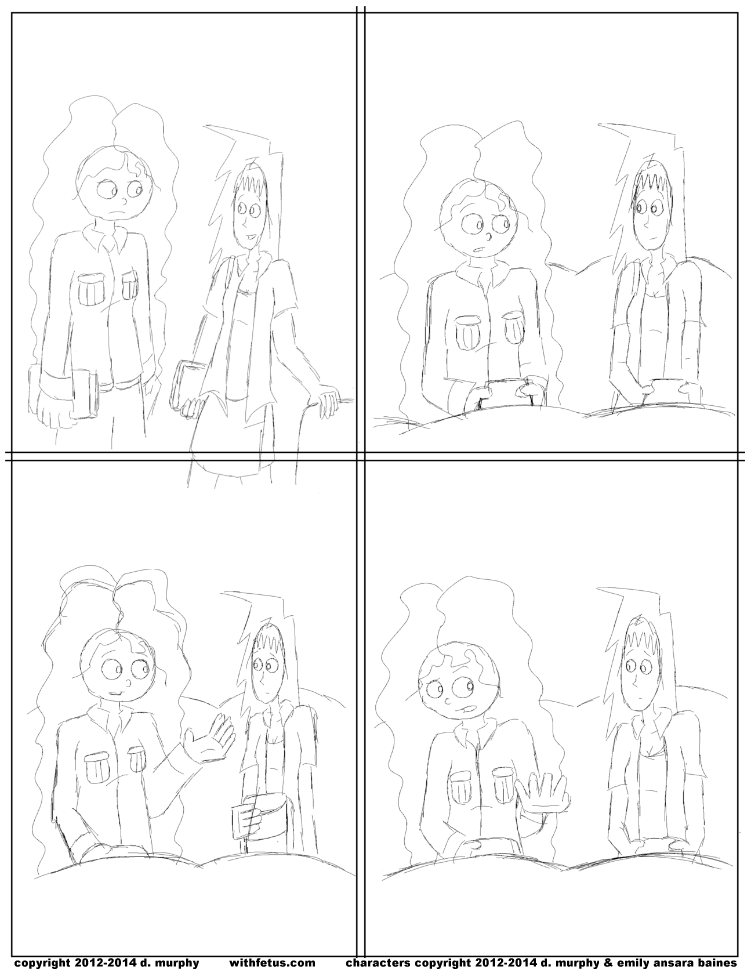
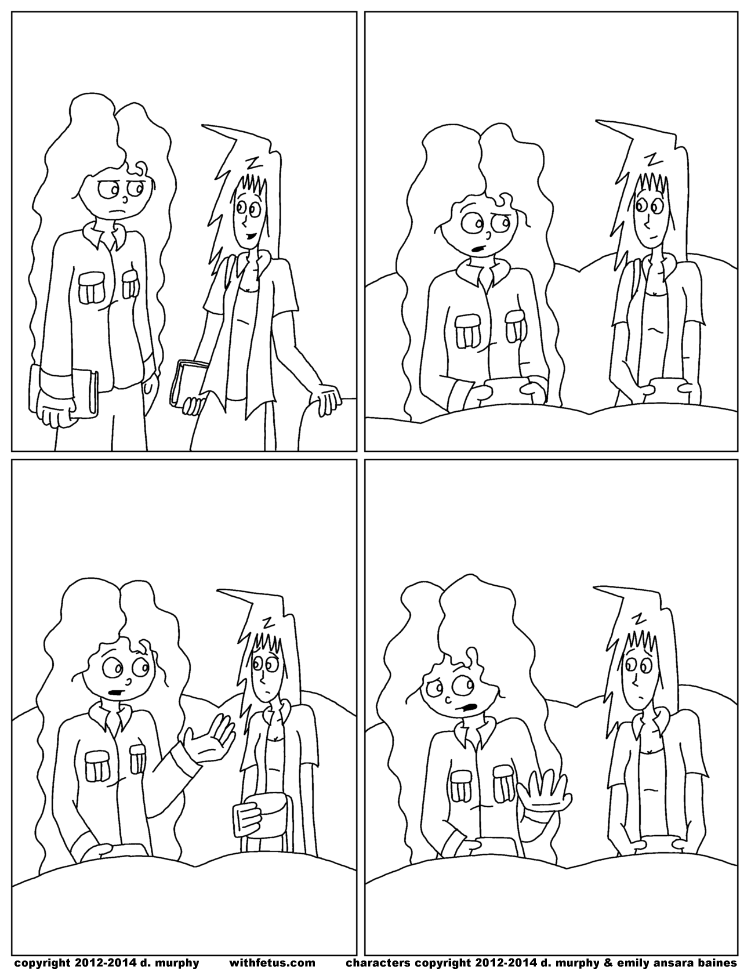
Step Two: Pencil Sketch (approximate time: one hour fifteen minutes) During this stage I set my brush width to one pixel and try to draw everything making slight adjustments for size and placement. I generally draw the panels in script order, drawing characters heads, bodies, faces, and hair in that order. The canvas is roughly three and a half times as big as the finished comic posted to the site, and I generally draw most of this zoomed out to only 66% of this size, zooming in to 200% to add detail. I draw in black which is probably something I should stop doing, and afterwards I create a new layer and add panels by first creating a large rectangle around everything and then bisecting it horizontally and vertically by narrower rectangles which I'll then delete the irrelevant portions. Though often I don't add the lettering until later. It's helpful to add the lettering now if there's anything particularly complicated regarding balloon placement as it's much easier to edit now than later. Unfortunately the amount of time devoted to lettering was not isolated from the amount of time spent sketching.
Step Three: Lineart (approximate time: forty-five minutes). This stage consists of tracing the sketch drawn in the previous step on the same layer where I created the panels, and usually I'd include the panels here instead of the previous step, but it seemed like having them in place after the sketch and before the rest of the lineart would be easier to follow. I generally work clockwise and increase the width of the brush from one to five pixels. In the future I may want to experiment with different widths for different elements or effects but for now I'm using a uniform sized brush. For the most part I try to stay true to the sketch and make any design choices at that point instead of this one, but details like hands are often left pretty rough in the sketch phase and things like Sophie's hair I tend to draw relatively free hand anyway so I don't worry about deviating from the sketch there.
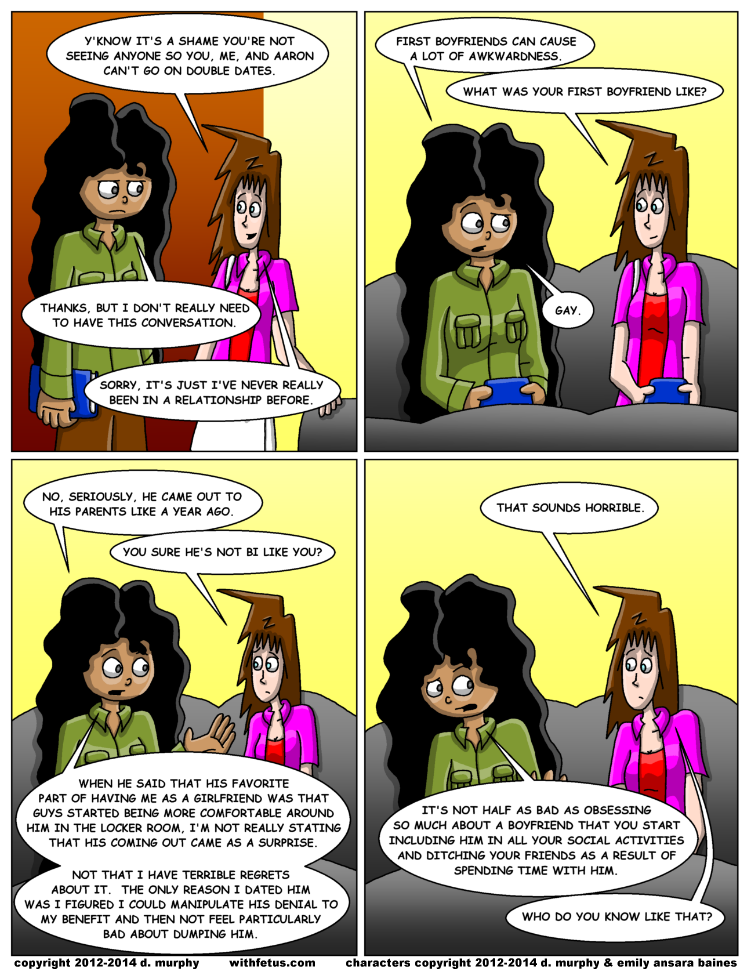
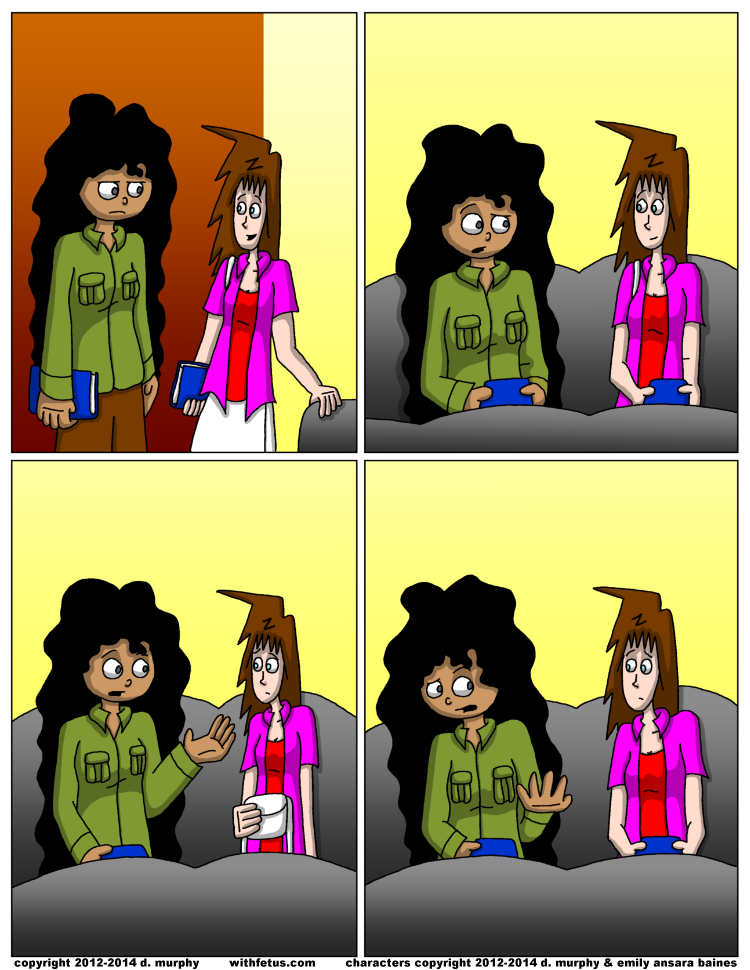
Step Four: Coloring (approximate time: 20 minutes). I create duplicate the lineart layer and do my colors on that so I don't lose the lineart of anything I fill in black, such as Sophie's hair. I spent a bit of time debating what shade of green to make Sophie's shirt, and you may notice one of her cuffs is a slightly different color as a result of my not noticing I missed a spot until going through highlighting (which I'll talk more about the significance of this then). In general most of the other colors are set and most everything from skin tones to hair and eye colors I've pretty much memorized for most of the major characters. I don't adjust these colors for time of day or lighting effects, though possibly I should and none of the characters have anything resembling a color palette for their wardrobes, though I generally try to put Aaron in blue and Ellie in pink. Figuring out characters' clothing is one of the things I struggle with so I cheat things somewhat by trying to keep characters in scrubs as much as possible. I made a conscious choice to have Jennifer make what generally amount to horrible fashion choices though she did get some maternity clothes that aren't horrible. Almost everyone has a handful of options they rotate through though many haven't been seen much in plainclothes and both Sophie's wardrobe and Ellie's casual/non-work attire could probably benefit from some expansion. I also add in any background at this point which I'll depict in basic gradients for the most part which contrasts the flat colors of the characters, though I don't know that's a good thing. Generally these gradients set a midpoint at the desired color then deviate 50 shades brighter and 50 shades darker along the rgb values. Once again I've memorized the values of many of the more frequent locations, though today's a new location meant to be a lecture hall for despite claims that Ellie and Sophie are college students, until today I believe they'd yet to be seen attending class.
Step Five: Shading (approximate time: 40 minutes). I duplicate the lineart layer again for shading and make the color layer invisible. I then trace where I want shadows and once all those lines are drawn go back with the fill tool trying to prevent pixels from being isolated for the fill bucket portion. In general I don't really do much in terms of lighting for particular lighting schemes and it's one aspect I do want to experiment with a bit more in the future.
Step Six: Highlighting (approximate time: 50 minutes). Highlighting was atypically slow for this comic as I made a major mistake in panel 2 that probably took at least ten minutes to correct, and there were in fact several other mistakes made that also took time to fix many of which can be observed by looking at the shadows Ellie's and Sophie's collars cast in this step vs. the previous one. For this step I duplicate the shadow layer but lay the highlight layer below the shadow layer, i also make the color layer visible once more and reduce its opacity to 50% before tracing the outline of highlights similar to how I traced shadows but now using white instead of black. Similar to the shading step I stay aware of what's white and won't get highlights much like what's black doesn't get shaded. Certain things like Ellie's skin can be difficult to see at this phase and unlike other steps it's the one without any checks for mistakes so I probably miss something here or there. The one mistake I did make was accidentally drawing on the color layer as opposed to the highlight layer which took a bit to correct (and this was caused by not switching back to the right layer after correcting the color of Sophie's cuff). Once the highlight areas are completed, I then select everything black from the shadow layer using the magic wand and delete it from the highlight layer, leaving just the highlights I wanted. The color layer is then restored to 100% while the shadow andhighlight layers are each reduced to 30%. Once this is finished I create a new layer to add eyelights which double somewhat as pupils by just spraypainting a single 10 pixel dot into the iris of each eye. This layer may also be used to mask word balloons that spill out the edges of panels. Separate layers will also be creted for semi-transparent objects such as glasses at this point. I then save this higher definition version that still has layer information before merging everything, blurring it and shrinking it to 29% the size. I create a new file which I paste the new version to, add the copyright, and save it as a .png. And that's it.
I'm not sure the above is interesting to anyone, or if it's all that easy to follow. My hope is that it might explain my process though or maybe help me become more efficient if anyone can find obvious things I could be doing faster. If anyone has any questions or needs clarification, let me know and I'll try to respond. In the future I might try to post something a bit better than this, but I figured so long as I was going to post a late comic, I might as well try to do something informative.
-D
Unfortunately you're going to have to use the back button on your browser to look at the links below in sequence as it's 4am now and I'm a bit too tired to make individual pages for everything, but I may make a more organized post of all this information in the future.
Step One: Scripting (approximate time: unknown). Generally I write my scripts in Notepad which has some obvious issues in terms of both saving and being able to undo making changes. It also means they're extremely difficult for anyone but me to read as I use shorthand for most character names (thankfully "ELL" and "SOP" are fairly easy to guess in this instance) and other actions and elements if I bother to include any (in this case there was nothing but dialogue which is true for the majority of scripts). Dashes denote panel breaks, and generally I'll separate the storylines into individual files with markers to indicate when weekends occur so I have an even multiple of five with an aim towards roughly 40-45 scripts for any individual story arc (with the storyline featuring Pamela continuing for an additional amount of time which I generally now believe was simply too long). Before moving the script into Manga Studio I'll generally paste it to Final Draft which (as the program assumes the whole thing's a scene heading) will both spellcheck and capitalize the whole thing, before moving the individual captions into Manga Studio. The writing of the script itself is probably one of the more variable elements of the process and though it should definitely not be said it doesn't take time, estimating that time can be difficult.
Step Two: Pencil Sketch (approximate time: one hour fifteen minutes) During this stage I set my brush width to one pixel and try to draw everything making slight adjustments for size and placement. I generally draw the panels in script order, drawing characters heads, bodies, faces, and hair in that order. The canvas is roughly three and a half times as big as the finished comic posted to the site, and I generally draw most of this zoomed out to only 66% of this size, zooming in to 200% to add detail. I draw in black which is probably something I should stop doing, and afterwards I create a new layer and add panels by first creating a large rectangle around everything and then bisecting it horizontally and vertically by narrower rectangles which I'll then delete the irrelevant portions. Though often I don't add the lettering until later. It's helpful to add the lettering now if there's anything particularly complicated regarding balloon placement as it's much easier to edit now than later. Unfortunately the amount of time devoted to lettering was not isolated from the amount of time spent sketching.
Step Three: Lineart (approximate time: forty-five minutes). This stage consists of tracing the sketch drawn in the previous step on the same layer where I created the panels, and usually I'd include the panels here instead of the previous step, but it seemed like having them in place after the sketch and before the rest of the lineart would be easier to follow. I generally work clockwise and increase the width of the brush from one to five pixels. In the future I may want to experiment with different widths for different elements or effects but for now I'm using a uniform sized brush. For the most part I try to stay true to the sketch and make any design choices at that point instead of this one, but details like hands are often left pretty rough in the sketch phase and things like Sophie's hair I tend to draw relatively free hand anyway so I don't worry about deviating from the sketch there.
Step Four: Coloring (approximate time: 20 minutes). I create duplicate the lineart layer and do my colors on that so I don't lose the lineart of anything I fill in black, such as Sophie's hair. I spent a bit of time debating what shade of green to make Sophie's shirt, and you may notice one of her cuffs is a slightly different color as a result of my not noticing I missed a spot until going through highlighting (which I'll talk more about the significance of this then). In general most of the other colors are set and most everything from skin tones to hair and eye colors I've pretty much memorized for most of the major characters. I don't adjust these colors for time of day or lighting effects, though possibly I should and none of the characters have anything resembling a color palette for their wardrobes, though I generally try to put Aaron in blue and Ellie in pink. Figuring out characters' clothing is one of the things I struggle with so I cheat things somewhat by trying to keep characters in scrubs as much as possible. I made a conscious choice to have Jennifer make what generally amount to horrible fashion choices though she did get some maternity clothes that aren't horrible. Almost everyone has a handful of options they rotate through though many haven't been seen much in plainclothes and both Sophie's wardrobe and Ellie's casual/non-work attire could probably benefit from some expansion. I also add in any background at this point which I'll depict in basic gradients for the most part which contrasts the flat colors of the characters, though I don't know that's a good thing. Generally these gradients set a midpoint at the desired color then deviate 50 shades brighter and 50 shades darker along the rgb values. Once again I've memorized the values of many of the more frequent locations, though today's a new location meant to be a lecture hall for despite claims that Ellie and Sophie are college students, until today I believe they'd yet to be seen attending class.
Step Five: Shading (approximate time: 40 minutes). I duplicate the lineart layer again for shading and make the color layer invisible. I then trace where I want shadows and once all those lines are drawn go back with the fill tool trying to prevent pixels from being isolated for the fill bucket portion. In general I don't really do much in terms of lighting for particular lighting schemes and it's one aspect I do want to experiment with a bit more in the future.
Step Six: Highlighting (approximate time: 50 minutes). Highlighting was atypically slow for this comic as I made a major mistake in panel 2 that probably took at least ten minutes to correct, and there were in fact several other mistakes made that also took time to fix many of which can be observed by looking at the shadows Ellie's and Sophie's collars cast in this step vs. the previous one. For this step I duplicate the shadow layer but lay the highlight layer below the shadow layer, i also make the color layer visible once more and reduce its opacity to 50% before tracing the outline of highlights similar to how I traced shadows but now using white instead of black. Similar to the shading step I stay aware of what's white and won't get highlights much like what's black doesn't get shaded. Certain things like Ellie's skin can be difficult to see at this phase and unlike other steps it's the one without any checks for mistakes so I probably miss something here or there. The one mistake I did make was accidentally drawing on the color layer as opposed to the highlight layer which took a bit to correct (and this was caused by not switching back to the right layer after correcting the color of Sophie's cuff). Once the highlight areas are completed, I then select everything black from the shadow layer using the magic wand and delete it from the highlight layer, leaving just the highlights I wanted. The color layer is then restored to 100% while the shadow andhighlight layers are each reduced to 30%. Once this is finished I create a new layer to add eyelights which double somewhat as pupils by just spraypainting a single 10 pixel dot into the iris of each eye. This layer may also be used to mask word balloons that spill out the edges of panels. Separate layers will also be creted for semi-transparent objects such as glasses at this point. I then save this higher definition version that still has layer information before merging everything, blurring it and shrinking it to 29% the size. I create a new file which I paste the new version to, add the copyright, and save it as a .png. And that's it.
I'm not sure the above is interesting to anyone, or if it's all that easy to follow. My hope is that it might explain my process though or maybe help me become more efficient if anyone can find obvious things I could be doing faster. If anyone has any questions or needs clarification, let me know and I'll try to respond. In the future I might try to post something a bit better than this, but I figured so long as I was going to post a late comic, I might as well try to do something informative.
-D
comments powered by Disqus

